

About
You can search for an available appointment based on attributes users (resources) assign to themselves.
Set up Resource Attributes (Administrator)
You can set up attributes that users can opt into for scheduling. To set up the available attributes
- Navigate to the Scheduler in NextStep Clinical: Menu > Scheduler.
- Click Setup
- Click Resource Attributes to edit the attributes available to users and on the schedule
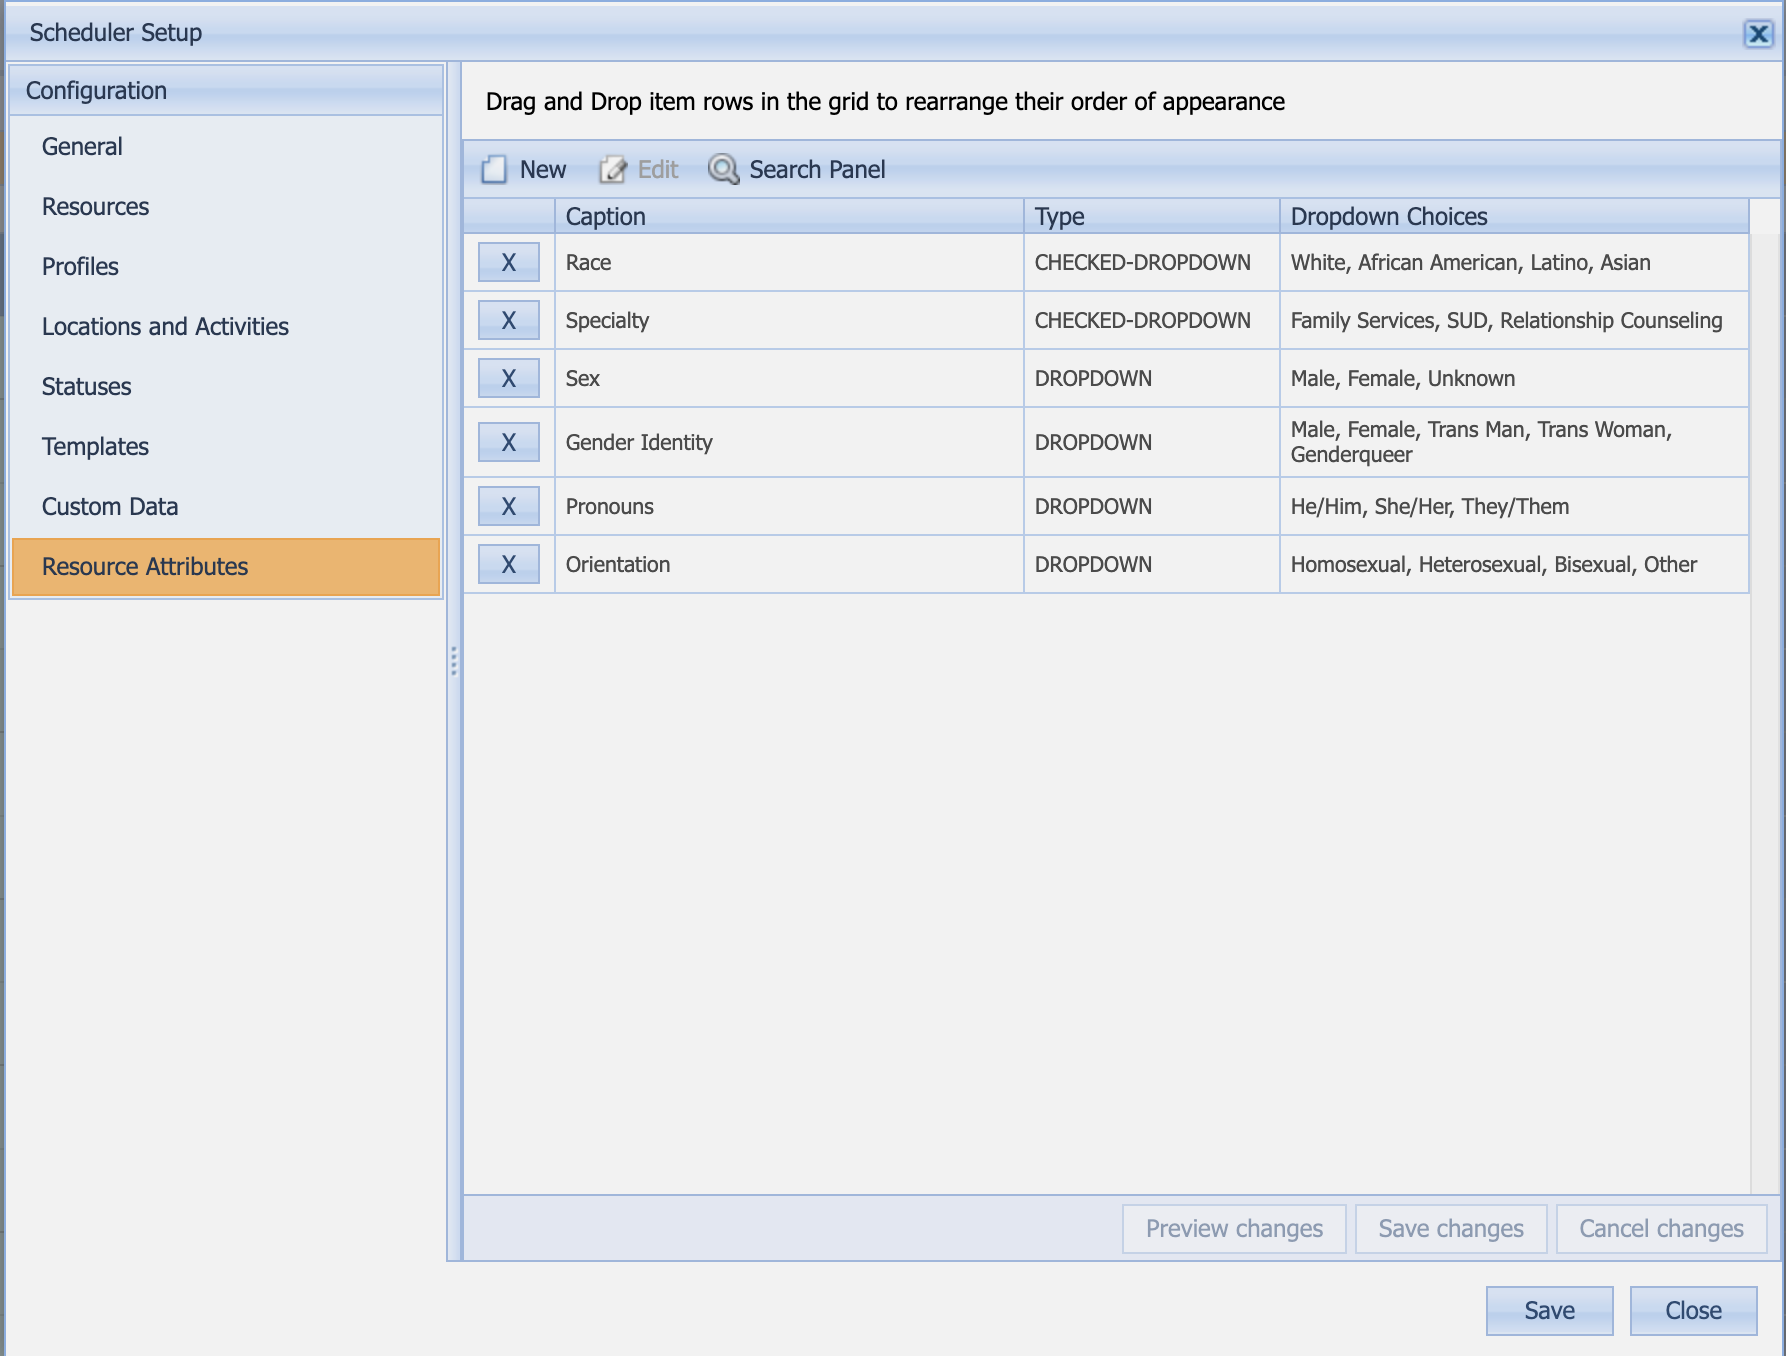
- Click the New button to create new options.
- Add a Caption for the attribute, a Type, like “DROPDOWN”, and, if a DROPDOWN, a comma-separated list of choices. CHECKED-DROPDOWN lets the user select one or more values.


These attributes then become available in the user's account settings and the Scheduler's appointment settings.
Set the values of your attributes for scheduling (Administrator)
To set the values of Resource Attributes for your users as an administrator
- In the scheduler, click the Setup button
- Select Resources
- Select the Name whose attributes you want to edit
- The Resource Attributes appear below the list of users
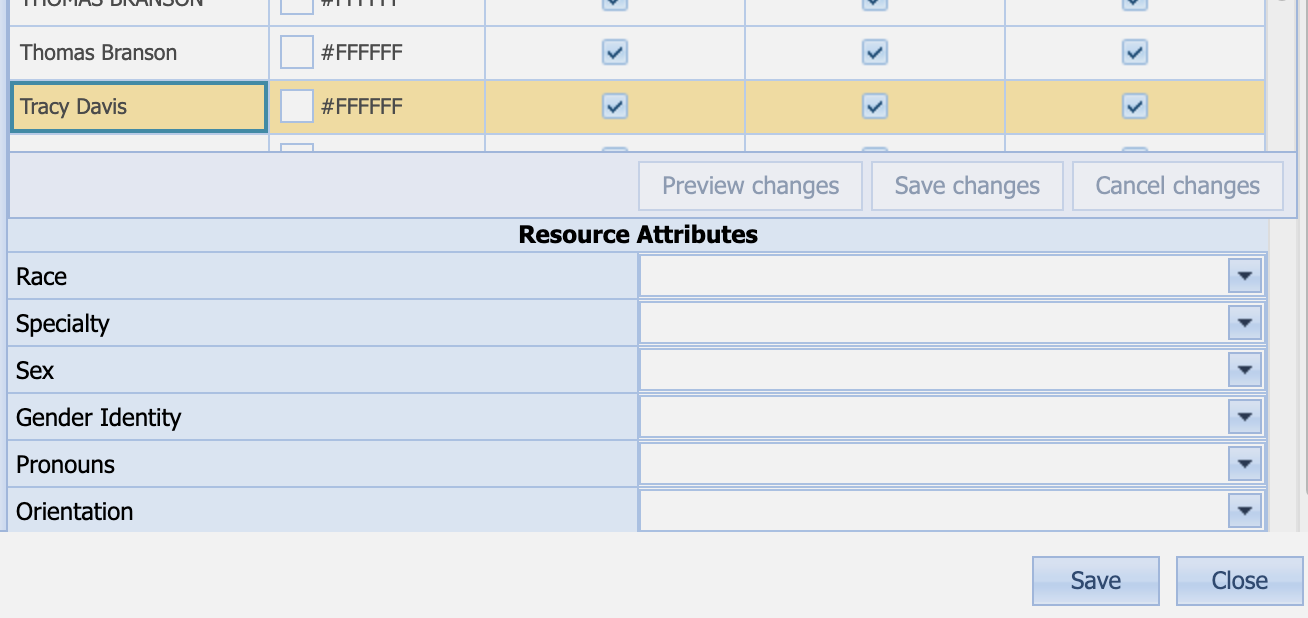
- Edit the Attributes and click Save


Set the values of your attributes for scheduling (User)
To set the values for the Resource Attributes to be used when scheduling, follow these steps:
- Navigate to your Account Settings in NextStep Clinical: Menu > Account Settings
- Scroll down to the SCHEDULER RESOURCE ATTRIBUTES section
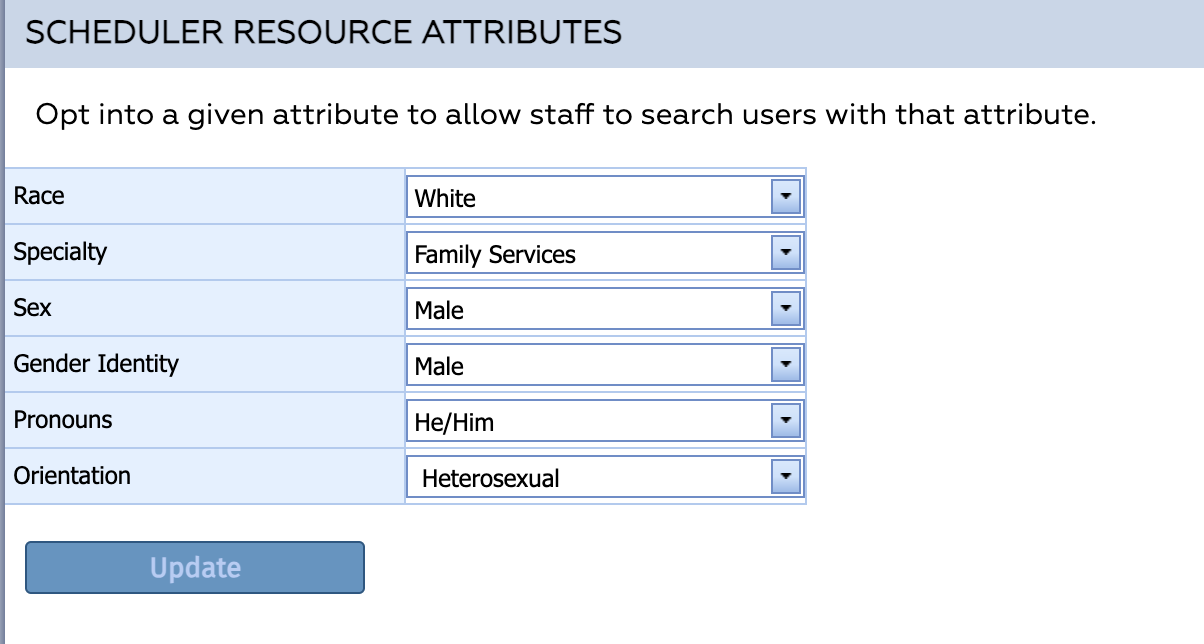
- Enter the values of the attributes you would like to be associated with you when a user is searching for an appointment based on a client's preferences.
- Click the Update button to save your changes.

Use Resource Attributes to select an appointment (Scheduler)
To select an appointment using Resource Attributes:
- Navigate to the Scheduler in NextStep Clinical: Menu > Scheduler.
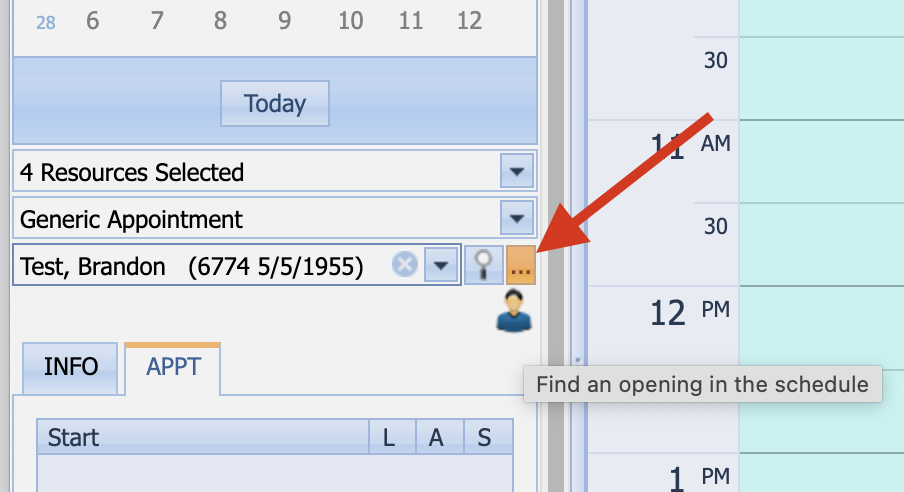
- Choose a Client
- Click the ellipsis button to the right of the Client name
- In the Find an opening in the schedule panel, select the Attributes you want to limit resources to and the Values of those Attributes you want to select.
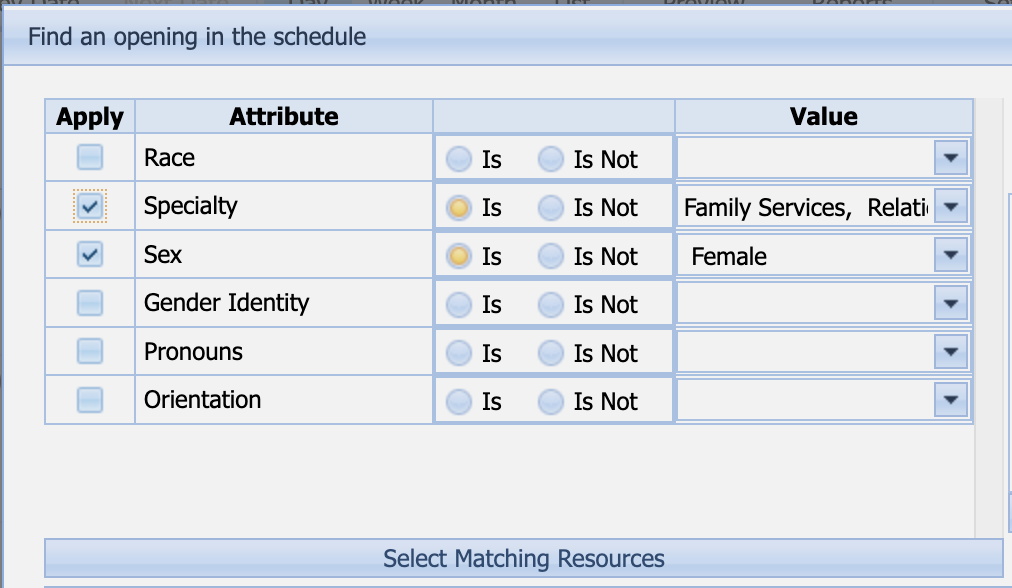
- Click the Select Matching Resources button to filter the resources that match those values.
- The resulting available appointments will display in the list at the bottom that you can choose from.

