

The DrFirst Identity-Proofing (IDP) process is managed entirely online by Experian. The IDP process verifies identities using a combination of personal identity verification (such as confirming the name, address, Social Security number, DEA number, date of birth), knowledge-based authentication (interactive questions designed to ensure an individual is who they claim to be), and verification of account information (generally a financial instrument such as a credit card number). The provider must also activate the token they receive and link it to their account.
Once you are contracted for EPCS, DrFirst sends written instructions by email about how to complete the IDP process. The email includes a link to initiate the process with Experian. This link expires after 30 days.
Note: Do not lose your hard token! You need this token to complete the IDP process and to generate a secure passcode each time you write a prescription for a controlled substance. |

Providers can download a soft token to their smartphone, tablet, or desktop. Click here to learn how to download the VIP Access soft token by Symantec to each device.
Note: The DEA requires that providers use a soft token on a device that is separate from the device they use for ePrescribing. |

As an alternative to a hard or soft token, Imprivata allows you to use biometric, two-factor authentication. To use Imprivata you must:
- Upgrade to OneSign 5.0.
- Add Confirm ID 1.0.
- Have an Imprivata test server.
- Install ActiveX controls on each workstation.
EPCS Gold communicates directly with the Imprivata agent software installed locally through the web browser by using ActiveX controls. The Imprivata agent on the local computer is configured to then communicate to your site’s own Imprivata server.
To begin the IDP process, open the registration invite you received by email and click the link to register. Your browser opens to the registration website. Enter your NPI and the Invite ID included in the email.
 Select the Checkbox and click the I Agree button to accept the terms of use.
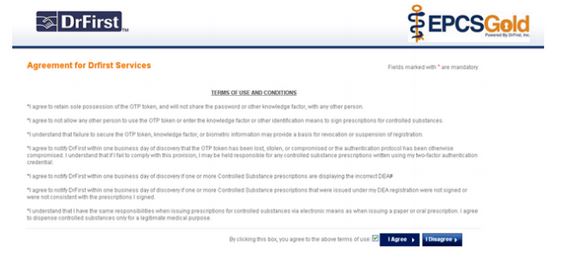
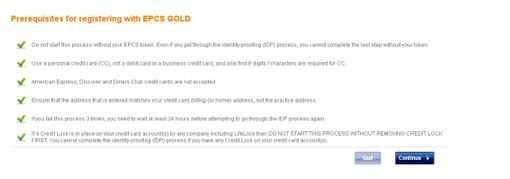
Next, check and acknowledge the prerequisites, and click the Continue button.
 The seven-step IDP process begins. The first step is User Registration. Enter all required personal information. Optionally, enter credit-card information to assist with accurately confirming your identity.

- If you are using a credit card to assist with confirming your identity, you must use a personal Visa or Mastercard, not a debit card. It is important to enter an address and that matches the billing address and phone number associated with the credit card used.
- When entering your DEA #, use all capital letters (for example AA1234567, not aa1234567 or Aa1234567). Enter your primary DEA #, not a special DEA # or special identification # that has been assigned to you in order to prescribe addiction medications.
- If you enter incorrect demographic information, EPCS Gold displays a message that informs you of an unsuccessful identity-proofing. If you enter demographic information correctly, the IDP process progresses to the next step where you are asked a series of questions pertaining to personal financial information.

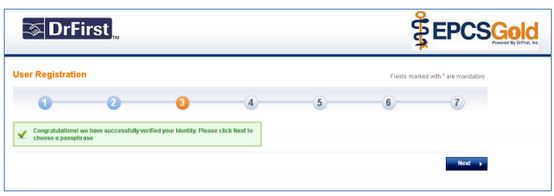
Note: The system does not allow the provider to continue identity-proofing for 24 hours if any of the questions are answered unsuccessfully three times in a row. Once completed, the IDP process progresses automatically to Step 4, confirming that you have verified your identity. |
 Next, you have to create a passphrase to use to access your account in the future and during the process of sending a scheduled medication. The passphrase needs to be at least 8 characters long and must include at least one capital letter and one number. If you forget your passphrase, only you can reset it. You must therefore create a security question/answer.
 EPCS Gold displays a confirmation message when you successfully create the passphrase.

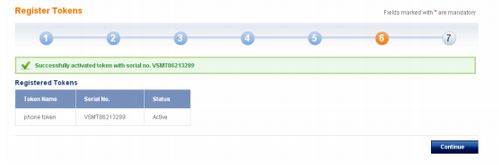
In Step 6, the IDP process asks you to add your EPCS token(s) to your account. You can also use a soft token to activate your account. To use a soft token, access your App Store, search for the VIP Access application, and download it to your device. The device must be separate from the device you are using to prescribe controlled substances.
When you set up your soft token, you are asked to enter the following information:
- A nickname for your token.
- The serial number from the back of the hard token, which starts with AVT, or the Credential ID from the token downloaded from the App Store, which starts with VSMT. When entering the serial number, make sure to enter the serial number/Credential ID using all capital letters.
- The OTP PIN from the hard token (security code from the soft token).
Note: On the hard token, the PIN changes every 30 seconds, so if it disappears before you have a chance to enter it, simply push the blue button again. |
- After completing the IDP process, providers have the ability to add multiple tokens to their account. Providers that do not wish to add multiple tokens after completing the IDP process can click Cancel Additional Token. Providers continue to have the ability to manage their tokens within the EPCS Gold Prescriber Dashboard later if needed.

Finally, EPCS Gold displays a confirmation message that your token has been added to your account.
 The seven-step IDP process concludes with Experian, the vendor that DrFirst has selected to provide identity verification, sending a letter by FedEx. This letter includes an IDP confirmation code for the identity-verification session you completed and instructs you to log back in to enter the confirmation code.
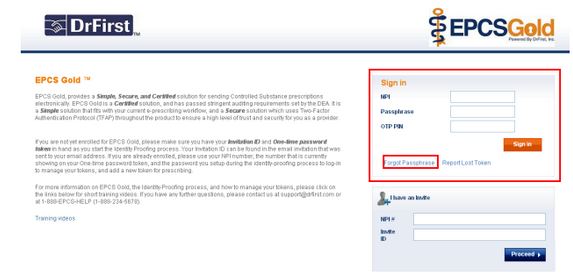
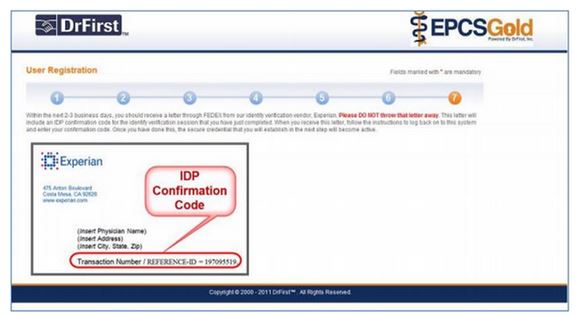 To become fully enrolled, you must then log back into the EPCS Gold website and enter the IDP Confirmation Code that is included in the letter. In order to log back in, you need your token to enter the OTP PIN and the passphrase that you created when activating your EPCS token (as described above). You can reset your passphrase if you forget it.
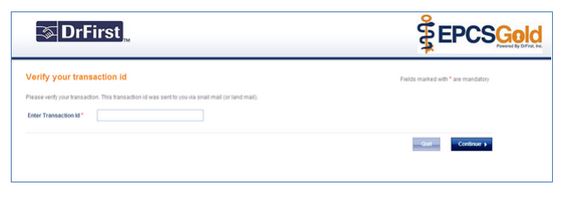
 After you’ve logged on, in the Enter Transaction ID field, enter the IDP Confirmation Code or Transaction ID included in the letter that Experian sent you. After entering the IDP Confirmation Code or Transaction ID, click the Continue.
Note: Providers are only fully enrolled after they have entered the IDP Confirmation Code into the website according to the instructions. Each provider must complete all seven steps of the IDP process. Any provider that does not complete all seven steps must begin the process again by accessing the link to the IDP system that was in the original email that DrFirst sent. If you have any questions about completing the IDP process, or if you are unsure if Step 7 has been completed, send an email to registerepcs@drfirst.com. |
After your provider(s) have completed Step 7 of the IDP process, each provider must be activated by an Agency Administrator for EPCS in the Logical Access Control (LAC) dashboard.
Click here to view a video of the IDP process.