

About
NextStep's EHI feature lets you export all Electronic Health Information (EHI), captured in NextStep, for a single client or for all clients.
Enabling EHI
- To enable the Export EHI feature for a user, you need to be an administrator.
- Navigate to MAINTAIN USERS and select the user you wish to add the EHI feature.
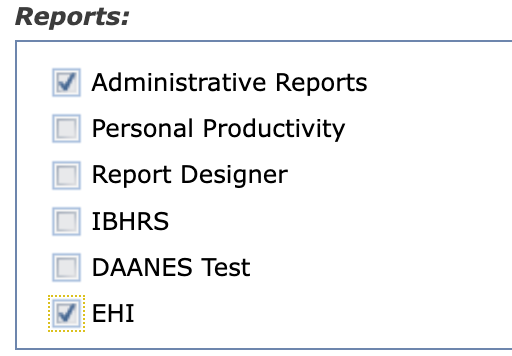
- Scroll down to the Reports section of the Main Menu Privileges and turn the EHI checkbox on.
- Then click the Update User button at the bottom of MAINTAIN USERS to save your changes.
- When that user views the NextStep MAIN MENU, they will now have an EHI button in the Reports menu.


Running EHI
- To export data for a client or all clients, navigate to MAIN MENU > Reports > EHI.
- Select the EXTRACT REPORT button to open the EHI Dashboard.


Psychotherapy notes or info used for a legal action
You can identify forms and notes that gather psychotherapy notes or info used for a legal action in the Form Setup and Note Setup. The information should not be included in the EHI. To identify these Forms and Notes:
- Open Forms in Form Setup and turn on Skipped for EHI Export.
- Open Notes in Notes Setup and turn on Skipped for EHI Export.

Forms and Notes tagged in this way will be skipped when extracting data for EHI.
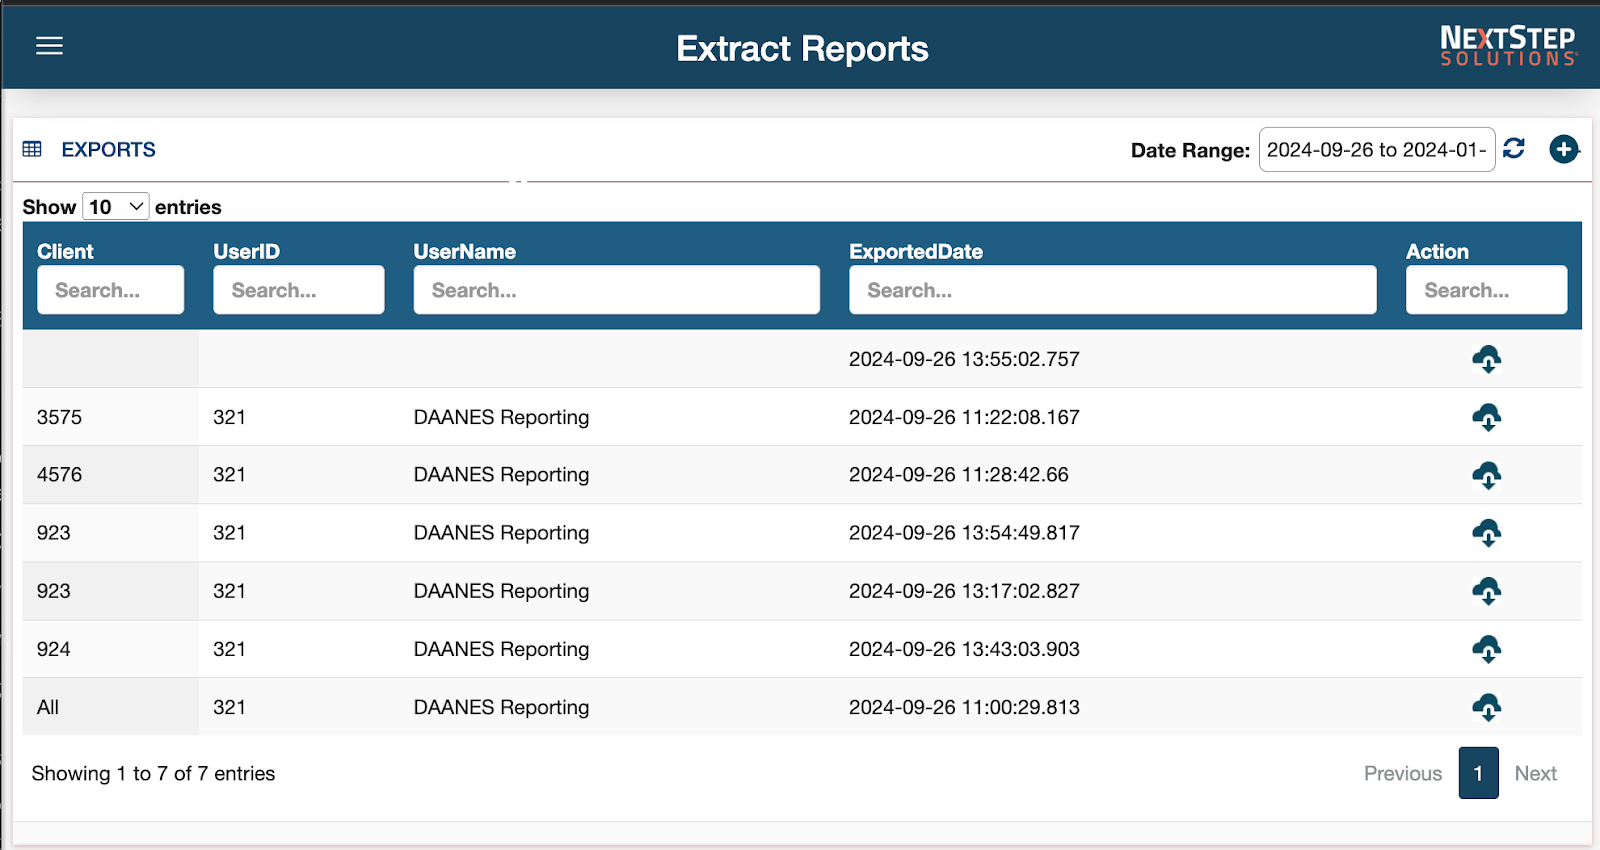
EHI Dashboard
- When you click EXTRACT REPORTS, the EHI Dashboard is displayed.

Creating an Extract
- To create a new export, click the plus sign button in the upper right-hand part of the dashboard. You are then able to select All Clients or a single client.
- In the example below, the user is requesting an export for client #1123
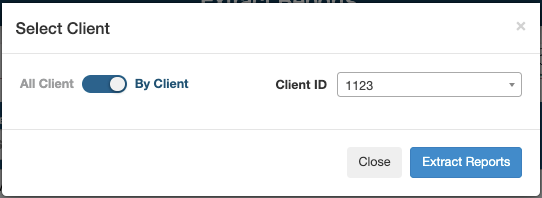
- Once you have selected a client, click the Extract Reports button and the EHI file will be generated for the selected client (or All Client).
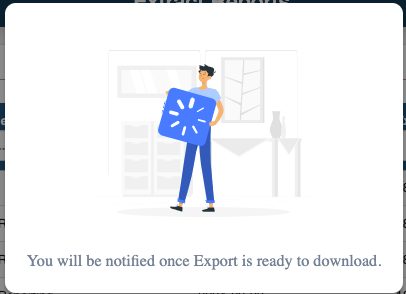
- If the extract completes before you close the dashboard, you will be notified that the generated data is ready for download.

- You will also receive an email when the EHI data export is complete. Keep in mind that if you are exporting data for All Client, the export could take a very long time.


Download Results
- Once the data has been generated, you can download the EHI information.
- Find the line item that represents the file you generated and click the download button.
- Next, NextStep will then prepare the download and display the following:
- Once the download is ready, NextStep will display the following:
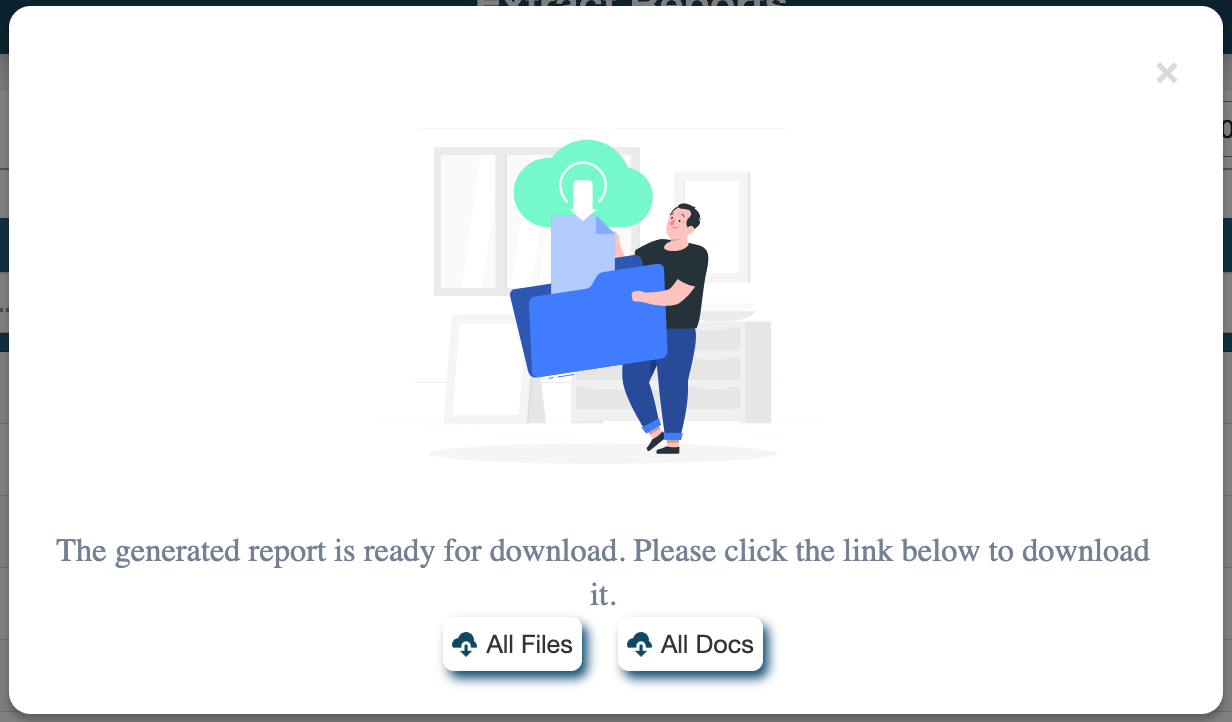
- You can click the following:
- All Files: Download all csv files containing discrete EHI data. This will download a file with a name like Client1123Data.zip
- All Docs: Download all documents attached to the extracted client(s). This will download a file with a name like Client1123Document.zip


Document Filter
Most of the dashboard displays the extracts that have been created. You can filter these extracts in multiple ways.
- DateRange Filter
- The Date Range field lets you filter on the date the data was exported.

- The Date Range field lets you filter on the date the data was exported.
- Column Filters
- Each column also lets you view and locate a file you created
- Client: filters the client(s) associated with the file. Enter the Client ID, a partial ID, or 'All" for exports for all clients.
- User ID: filters based on the user ID who created the file
- User Name: filters based on the user name of the user who created the file
- Exported Date: filters based on the date the export was created
- Each column also lets you view and locate a file you created

For more information on EHI:
- Reference the EHI Data Dictionary